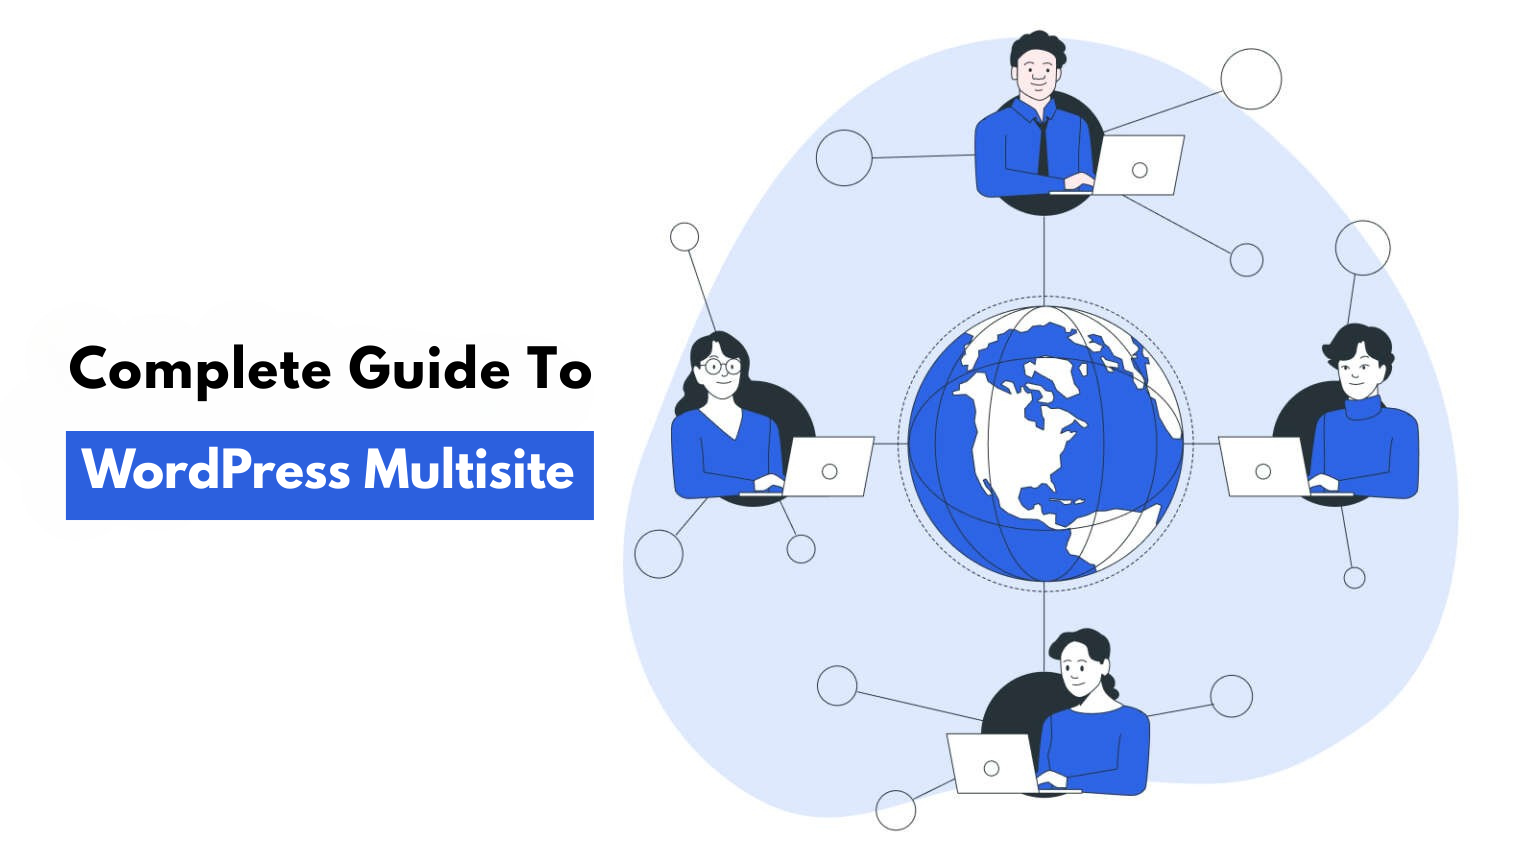
Helping you know the details of WordPress Multisite. Read on to know the details.
WordPress Multisite is a useful tool for anyone managing multiple sites. It makes it easier to handle updates, dashboards, and plugins. You’re managing a network of blogs, have a company with multiple sites, or have a group of clients’ sites, for example. Keeping them all separate soon becomes overwhelming and unproductive.
Using Multisite, you have one system to keep all your sites uniform, make maintenance quicker, and streamline your process. From one dashboard, you can update in one step, change user roles, and keep all behind-the-scenes operations going. Would you like to know more about it and whether or not it is for you? Stay tuned—this article will step you through everything there is to learn to become an expert at WordPress Multisite.
Suppose you’re looking to keep your network of sites running smoothly. In this case, think about using WordPress Maintenance Services. They can keep your WordPress multisite setup updated, secure, and running well.
What is WordPress Multisite?
WordPress Multisite, once called WordPress Multi-User (WPMU), is a strong feature. It lets WordPress development agencies manage many websites from one dashboard easily.
This feature is great for businesses, organizations, and individuals. It helps them manage websites easily. Users can update and change all sites in the network without hassle.
A prime example of a WordPress multisite installation is WordPress.com, which hosts millions of websites.
With Multisite WordPress, you can establish a main website or network and seamlessly add multiple subsites. In this setup, all sites use the same WordPress installation, database, and plugins. This turns one website into a network of connected sites.
Key Features of WordPress Multisite
WordPress Multisite is a simple tool. It lets you manage multiple websites from one WordPress installation. Instead of installing WordPress on each website, you can manage many websites from one control panel.
Such websites may employ subdomains (in the form of https://john.example.com) or subdirectories (in the form of https://www.example.com/john/). You can even link in fully independent domains to individual sites if necessary.
Since you operate the network, people refer to you as the Super Admin. This means that you have complete control over all facets, from user permissions to site settings and creating new sites. A standard site admin, by contrast, is in charge of their own site within the network. While they may manage posts, pages, and everyday content, they’ll have no access to network settings or tools.
One of the biggest benefits of being a Super Admin is controlling themes and plugins for the whole network. You can install them all at one time, but select which ones to make available for other sites to use. This consolidates security and streamlines maintenance.
You can apply custom themes to many sites. This is very useful if you need to support different languages, currencies, or brands.
They control the content jointly. Super Admins can view content on all sites, but individual admins manage what appears on their own sites. They cannot install plugins directly. However, they can activate or deactivate plugins that the Super Admin has made available.
Overall, WordPress Multisite is an intelligent way to efficiently operate numerous sites. It streamlines administration, maintains uniform tools and design, and allows for expansion of web presence with less effort.
Who Should And Shouldn’t Use WordPress Multisite?
Although WordPress Multisite is available for central management of multiple sites, it is not for everybody. One main limitation is that all sites in the network share one database. This makes it hard to back up or move individual websites. Therefore, users find that WordPress Multisite works best when all sites closely relate and share the same domain or organization.
A university can use WordPress Multisite to manage different sites. These can include department pages, faculty blogs, event sites, or student forums, all under one main university domain. Since all their content, branding, and setup are the same, managing them in one network is efficient. This makes updates, backups, and user permissions easier.
Conversely, freelancers or web shops that manage unrelated clients’ sites should not use Multisite WordPress. The shared database can become problematic if one client wishes to transfer their site to another platform. Each site would not have the independence necessary for such processes. Standalone WordPress installations in such situations grant more control, flexibility, and reassurance to both clients and developers.
Read more: How to Hire WordPress Development Company for Your Business?
How to Setup WordPress Multisite?
Step 1 : Prepare Your WordPress Installation
Before enabling WordPress Multisite, ensure your current WordPress setup is ready for network configuration. If this is not a fresh installation, it’s strongly recommended to back up your database and site files, as core changes will be made during the process.
Confirm that Pretty Permalinks are functional. Navigate to Settings > Permalinks and select any structure other than “Plain” to verify that your server’s URL rewriting is working correctly.
Deactivate all active plugins temporarily to avoid conflicts during the network setup. You can reactivate them after the Multisite WordPress installation is complete.
Suppose you intend to run WordPress from a subdirectory (rather than the web root). This configuration should be in place before enabling Multisite, as it affects how the network is initialized and accessed.
Step 2: Enable the WordPress Multisite Feature
By default, the WordPress Multisite plugin is disabled. To enable it, you need to add a line of code to your site’s wp-config.php file. You can do this by accessing the file through cPanel or by connecting to your site via FTP.
Once you locate the wp-config.php file in your site’s root directory, open it and find the line: “That’s all, stop editing! Happy blogging.” Just above this line, insert the following code:
/* Multisite */
define( 'WP_ALLOW_MULTISITE', true );
After adding the code, save the file and refresh your browser. The WordPress Multisite feature is now enabled.
Step 3: Setup WordPress Multisite Network
Now, head over to “Tools” Network Setup.” If you get a message that Apache’s mod_rewrite module needs to be installed, don’t worry—most top WordPress hosting providers already have this module enabled by default.
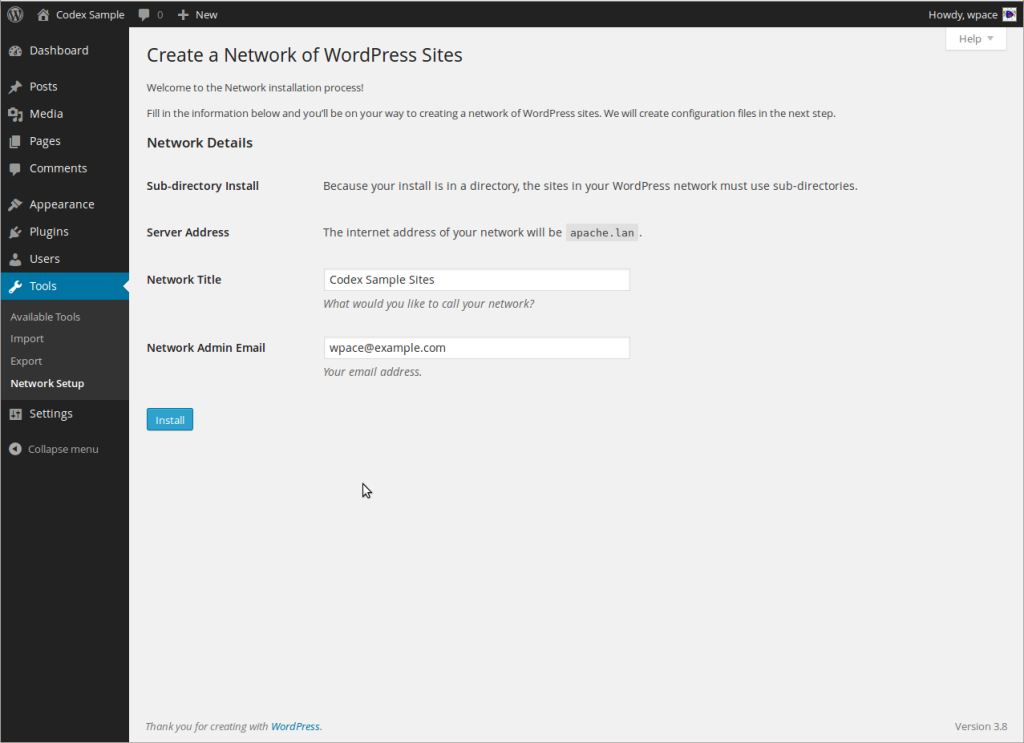
Choose how you want your network’s websites to be structured using subdomains (like site.example.com) or subdirectories (like example.com/site).
Next, enter a title for your network and double-check that the network admin email address is correct.
Once everything looks good, click the “Install” button.
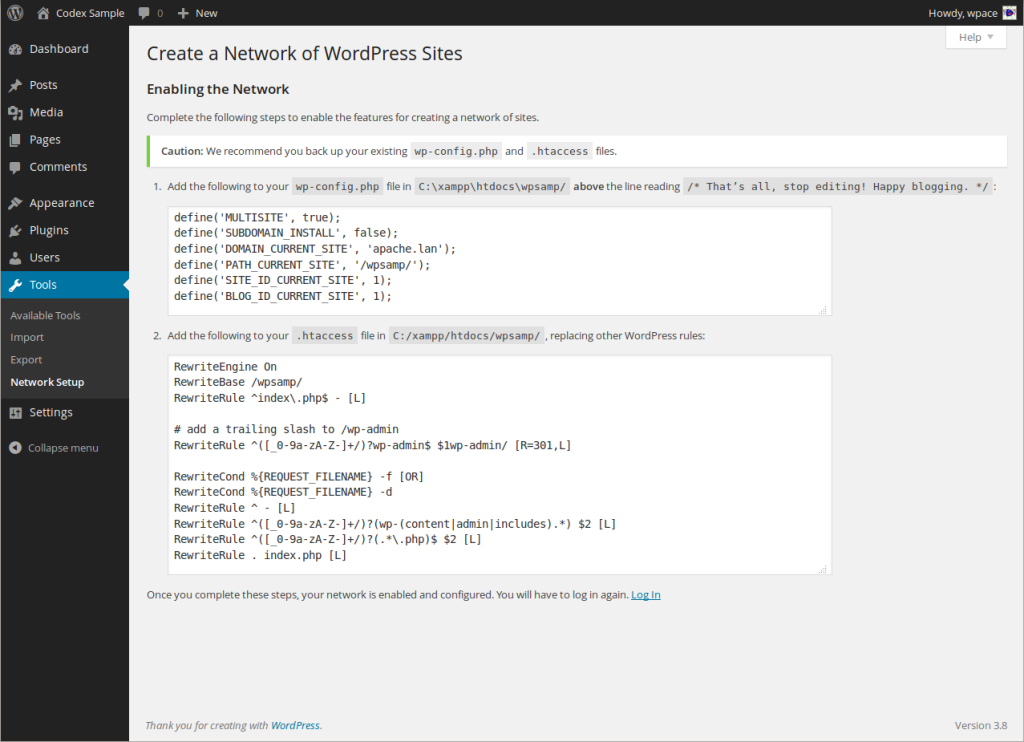
After installation, you’ll see some code that needs to be added to your wp-config.php and .htaccess files. Use an FTP client or your hosting control panel’s file manager to do this. Just copy and paste the code into the appropriate files.
After file setting, it is now time to follow the above instructions to move ahead when setting up things.
Step 4: Configure Your WordPress Multisite Network
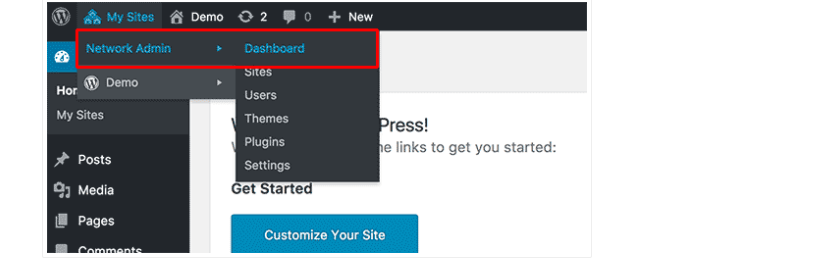
To configure network settings, go to the dashboard and tap network dashboard. From there add new sites, and other important configurations. Now tap on Network Admin >Dashboard.
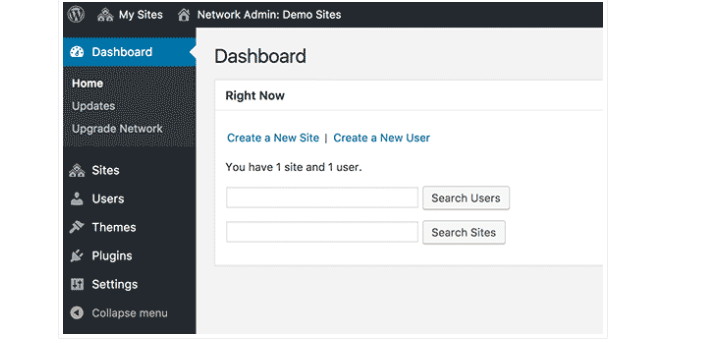
Now you will be redirected to the WordPress Multisite Manager. There are new menu items to manage multisite WordPress network. You will also come across a Right Now dashboard widget that helps to generate a new site and add new users.
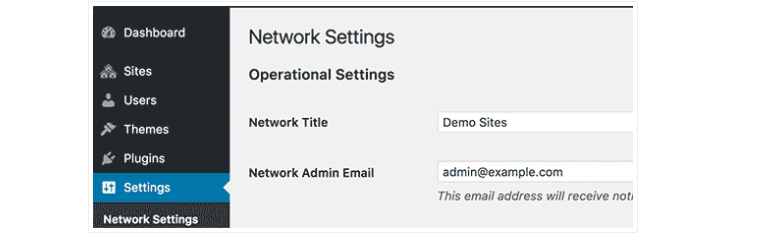
To ensure network setting, click on the settings link present in admin dashboard sidebar followed by network Settings. The first option you will see on network settings page will help to set your network title and admin email address.
How to Enable User Registration on WordPress Multisite?
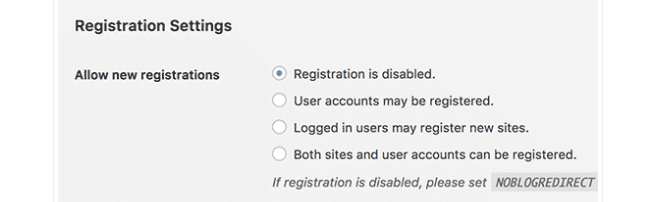
The Registration Settings section on the Network Settings page is essential for managing user access in your WordPress Multisite network. By default, site and user registrations are disabled. However, you can enable them to allow existing users to create new sites or let new users sign up on your multisite network. This flexibility makes it easier to expand your network while maintaining control over user access.
When enabling registration on your multisite network, you can select the Registration Notification option to receive email alerts whenever a new user or site is registered. Additionally, if you want to allow individual site administrators to add new users to their sites, you can enable the Add New Users option.
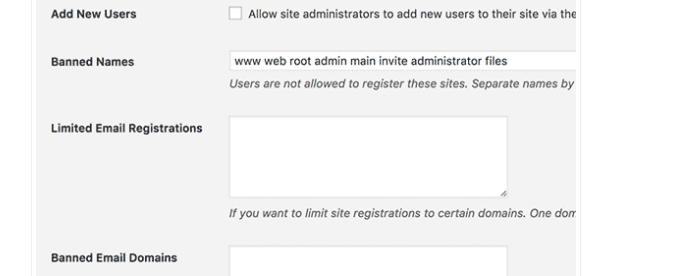
The Limited Email Registration feature enables you to restrict site or user registrations to specific email domains. This ensures that only users from designated domains, such as your organization’s, can register and create accounts or sites. Additionally, you have the flexibility to block registrations from certain domains as needed.
-
New Site Settings
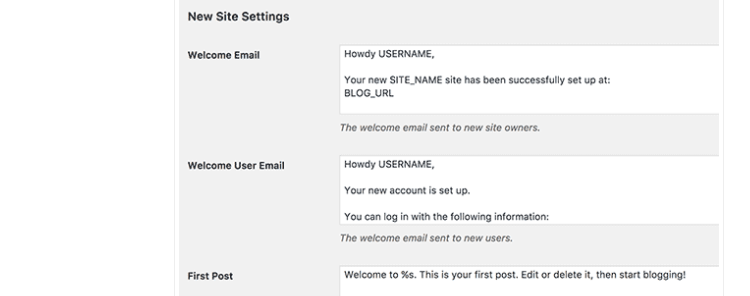
Congratulations! Your WordPress Multisite Network is almost fully installed and set up. However, a few final steps remain. The **New Site Settings** section allows you to configure default options for newly created sites within your network. Here, you can customize welcome emails, as well as the default content for the first post, page, and comment.
-
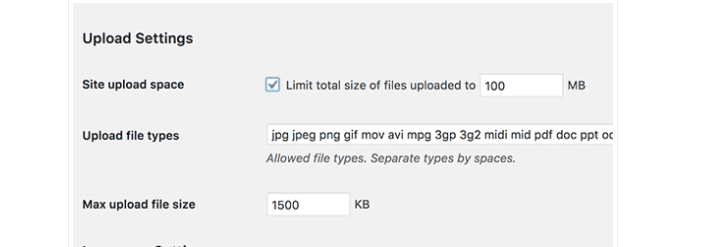
Upload Settings
You can set a file size limit, with the default upload types including images, audio, video, and PDF files.
-
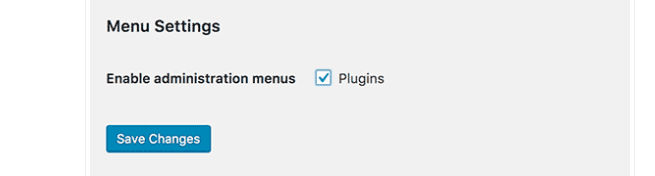
Menu Settings
Installed plugins and themes will be accessible to individual sites within the network. You can also enable the administrative menu for the plugins section on your network sites, allowing site admins to manage them.
Adding New Sites to WordPress Multisite Network
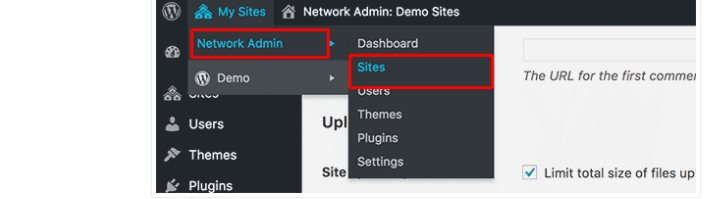
To add a new site to your WordPress Multisite Network, navigate to **My Sites » Network Admin » Sites** in the admin toolbar.
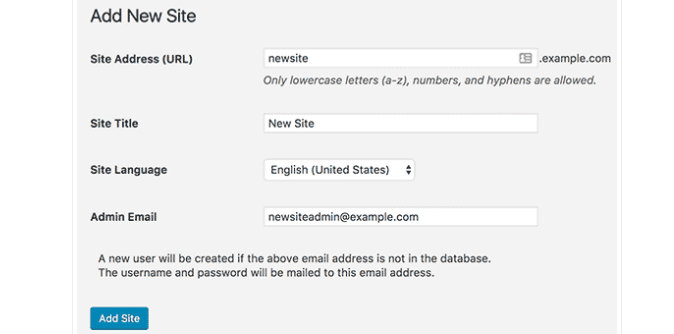
In order to add a new site, click on the Add New button at the top.
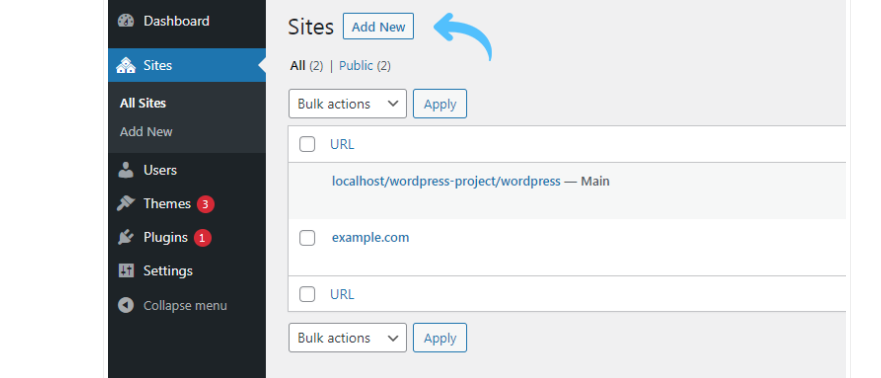
On the Add New Site page, you need to provide the site’s address.
How to Add Themes and Plugins to Your WordPress Multisite Network?
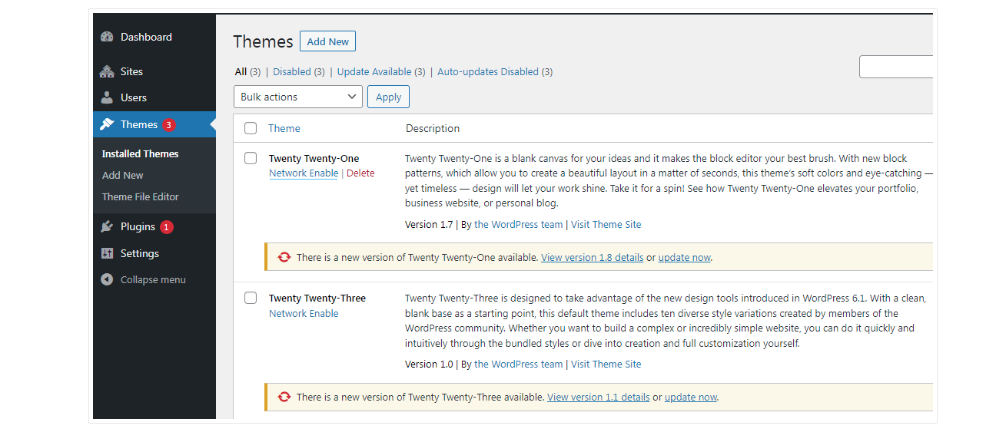
Here in this page, you will have a list of currently installed themes on your WordPress Multisite.
- Change to Default Theme For WordPress Multisite Network
To change the default theme for new sites you need to add the following code to your wp-config.php file.
// Setting default theme for new sites
define( 'WP_DEFAULT_THEME', 'your-theme' );- Installing plugins for your WordPress Multisite Network
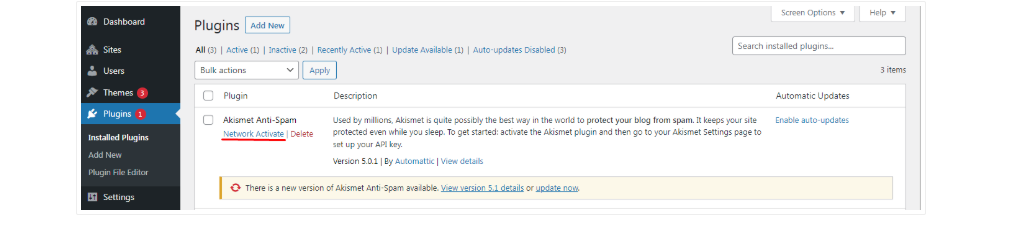
Visit My Sites » Network Admin » Plugins page to install plugins and click on the Network Activate link which is given below each plugin to activate them on your multisite network.
 In Conclusion
In conclusion, WordPress Multisite is a powerful feature that can save you time and money when managing multiple websites. If you need to run a network of related yet distinct sites, Multisite is a solution worth considering. Now that you’re familiar with its benefits, installation process, and troubleshooting tips, you’re well on your way to mastering Multisite management.
Have you tried using WordPress Multisite, or are you considering it for your projects? We’d love to hear about your experiences, questions, or challenges! If you need expert assistance, reach out to us — we’re here to help you every step of the way!